 Loading...

For every Blau-Metall sieve manufactured according to ISO 3310-2, we complete a certification inspection and save the inspection protocol in our records for at least one year. Customers can therefore request Inspection Certificates 3.1 for at least one year after receiving the product, without having to send the sieves back to us for measurements. Inspection according to Calibration guidelines, including at least three times the number of apertures required for certification, can be carried out at the request of the customer.
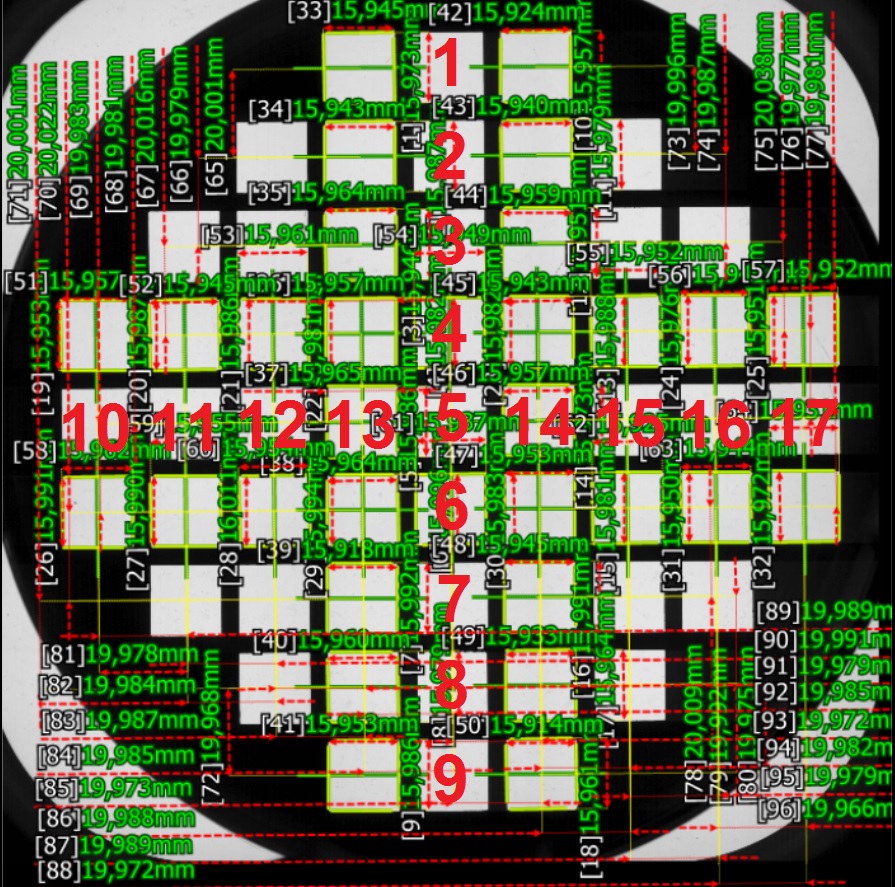
Assignment of aperture numbers: As outlined in ISO 3310-2, the optical inspection is carried out along two perpendicular straight lines, each at least 150 mm in length, whereas every line includes at least eight apertures for measurement (up to an aperture width of 16 mm). Numbers are assigned to the inspected apertures first along the –Y-direction (top to bottom) followed by the +X-direction (left to right) whereas the sieve label acts as reference (pointing down in the image to the right).
For apertures larger than 16 mm and Sieve Calibration, multiple lines will be measured in each direction and number assigned occurs sequentially, first for the Y-direction before numbers are assigned along the X-direction. Should all apertures of the sieve be measured, numbers will be assigned after the matrix principle, again with the sieve label acting as reference.
The compliance with the permissible rounding radius of square apertures, specified in Equation 1 of ISO 3310-2, can be verified through spot checks across the sieve if required by the customer and added as appendix to the Inspection Certificate.
Nomenclature & Translation of Inspection Certificate:
Width (Weite): Width w of every inspected aperture in Y-direction (Desired Value (Sollwert) corresponds to the nominal aperture width, the upper- (Obergr.) and lower (Untergr.) limits correspond to the permissible variation of aperture size, ref. ISO 3310-2 Table 1 Column 4)
Length (Länge): Width w of every inspected aperture in X-direction (Desired Value (Sollwert) corresponds to the nominal aperture width, the upper- (Obergr.) and lower (Untergr.) limits correspond to the permissible variation of aperture size, ref. ISO 3310-2 Table 1 Column 4)
Pitch (Teilung): Distance between the perpendicular bisectors of two adjacent apertures (Desired value corresponds to Preferred Pitch pnom, the upper- (Obergr.) and lower (Untergr.) limits correspond to the Parameters pmax and pmin of the permissible range for the aperture pitch, ref. ISO 3310-2 Table 1 Columns 5-7)
 German Website